Malabar spinach hails from East Asia and flourishes as a perennial in subtropical regions of the World, but is grown successfully as an annual elsewhere. Unlike most green leafy vegetables it flourishes in hot balmy weather.
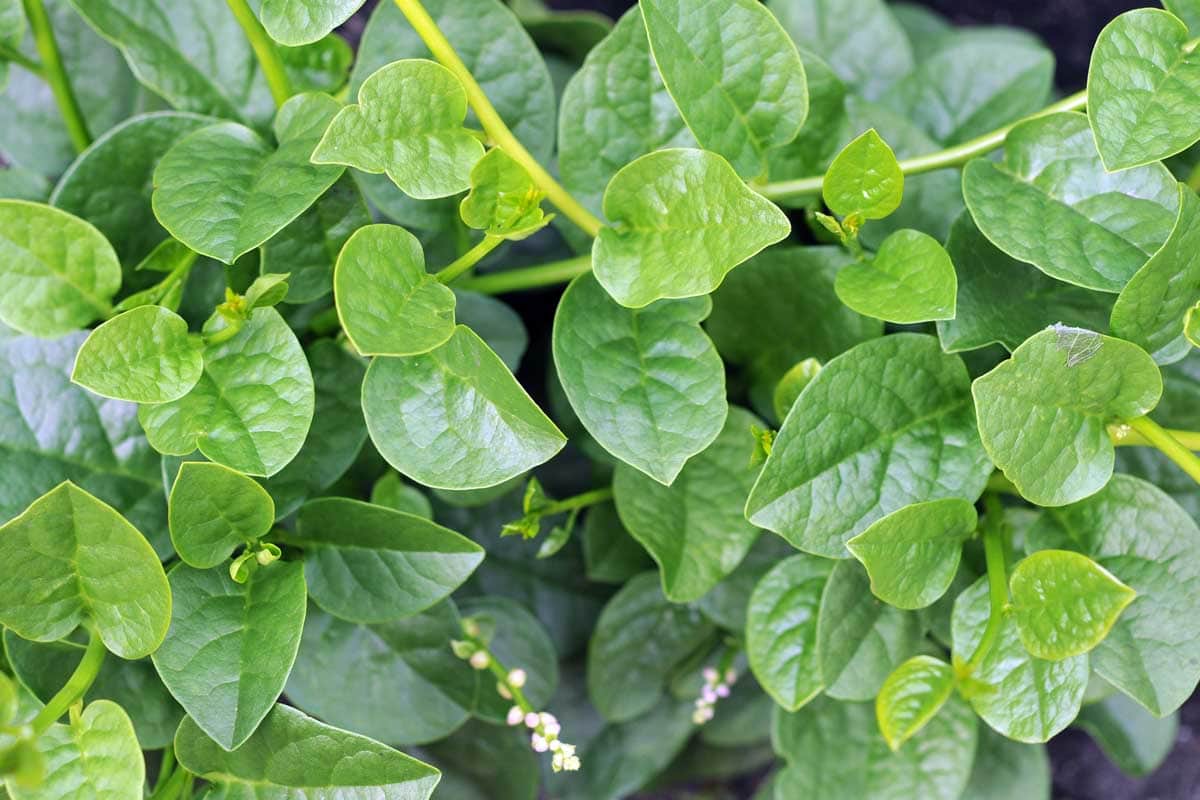
Botanically speaking it isn’t truly a Spinach, it is a vining plant. From a culinary point of view — well it isn’t really a spinach either. Eaten raw, it doesn’t taste like spinach, it has thick crisp and juicy leaves, something like iceberg lettuce with a taste reminiscent of citrus and pepper.
Cooked, Malabar spinach morphs to a taste more similar to true spinach but the texture still differs. It does not become as soggy as standard spinach and holds up better for soups, stir fries and even saute’s.
There are several popular varieties most are green leafed, a few are red leafed, such as red-stemmed Malabar spinach, which is quite popular.
Growing Tips
The vines average eight to ten feet tall and wide, allthough there are some dwarf varieties that are shorter. It produces small pinkish white-tinged blooms. The flowers if and when fertilized produce deep purple berries. The berries are somewhat edible, but tasteless, in India and vicinity it is used as dye and food coloring. If you ever gotten juice from ‘India Ink” berries on yourself – the juice from malabar berries is similar – the stain is difficult to remove.
Malabar spinach performs best in an organically rich, moist and fertile soil. Optimal Soil pH range is 6.5 to 6.8.
Partial shade is best for increased leaf size, but heat and humidity is absolutely essential. You would be well advised to sacrifice the partial shade for full sun if it means providing adequate temperature. The leaf size and yield may dwindle but the quality will soar.
Malabar spinach also requires constant water, it has a high moisture content, in its native environment it has adapted to warm and very rainy climatic conditions. A lack of moisture will cause the plant to bolt / blossom and turn the leaves bitter and unpalatable.
Propagation
Malabar spinach can be started from cuttings or seeds. Stem cuttings easily re-root in soil or water. Seeds can be saved for up to 4 years.
If starting from seed rough up the seed coat a tad with a nail file, sandpiper or some mildly abrasive material. It has a tough seed coat and the ‘scarifying’ will expedite germination and increase the success ratio.
Germination is somewhat slow – taking about 3 weeks and unless you live in a warm region, at least USDA hardiness zone 7 or warmer they should be started indoors. Seeds started indoors should be planted at least a month before transplanting outdoors, preferably longer. Transplanted seedlings should be spaced roughly one foot apart.
If you live in a suitable climate the Malabar Spinach can be direct seeded about 2 weeks after the last frost date. You should still scarify the seeds when direct seeding. Soaking them overnight before planting is also a good idea.
Germination Temperature: 65 F to 75 F
Germination Time 14 to 21 Days
Soil Conditions Damp – Consistent moisture will prevent flowering, which will render the leaves bitter.
Requires High Nitrogen fertilizer to produce abundant Leafy Foliage. Apply a thin layer of high nitrogen fertilizer at the base of the seedlings. Wash the fertilizer into the soil. Some well rotted manure wouldn’t hurt either.
A support such as a trellis is needed, it will grow successfully with peas on the same trellis but avoid cucumbers and squash as they are not compatible.
Well suited to higher temperature, flourishes in the the 90s F. Progress is retarded in cooler temperatures.