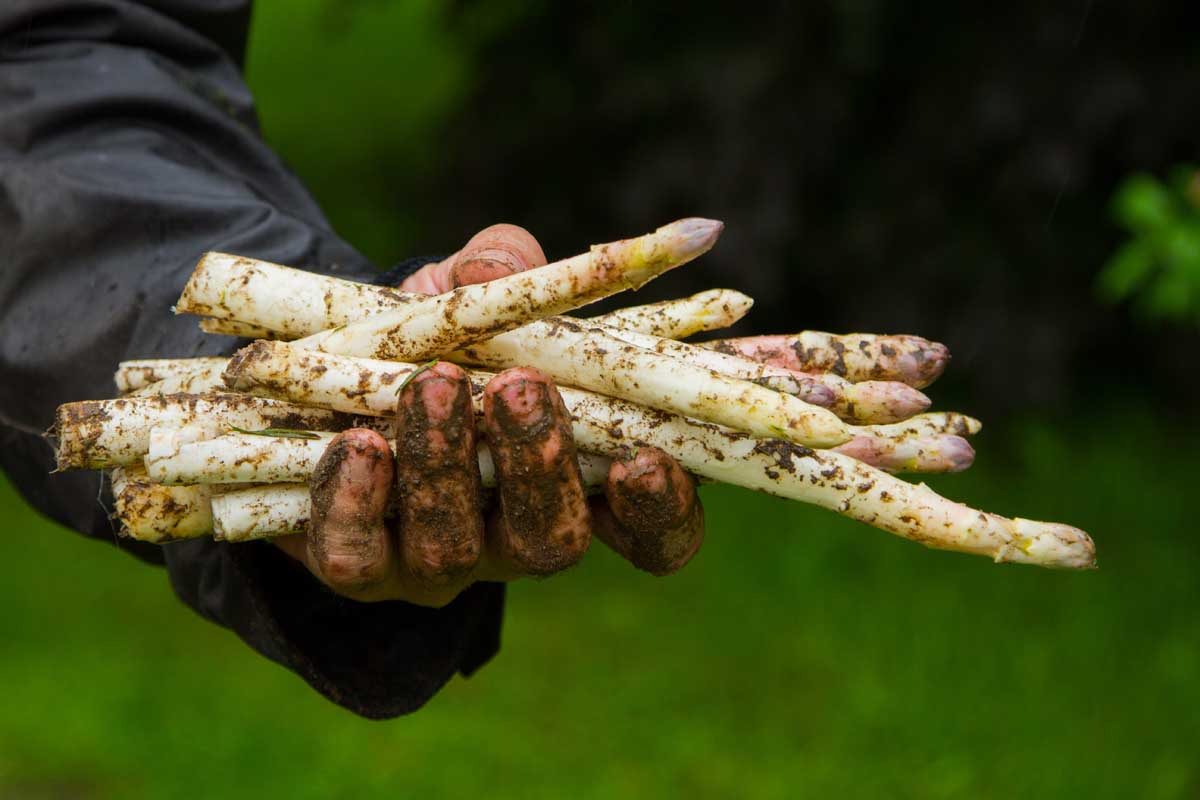
Asparagus itself can at times be a little tricky to propagate, white asparagus even more so. White or Albino asparagus is not a separate cultivar from normal green asparagus, it is the same plant grown differently – the trick is to deny the plant access to as much light as possible, thereby blocking its ability to produce chlorophyll.
Chlorophyll is the compound which gives plants their green color. Producing white asparagus is more labor intensive.
The end result is a white asparagus spear that has a much milder flavor, more delicate and less intense, some say it has a subtle nutty flavor. To grow White Asparagus the Plants should be at minimum of 3 years old.
Mound Method
Before asparagus shoots emerge pile up 10 – 12 inches of soil , sand, or mulch over the asparagus rows. The ground cover will be occupying the space that the asparagus spears would have grown into and gathered the suns rays in under normal conditions.
Asparagus spears should 7-9 inches tall at harvest, using this method – that 7-9 inches of growth is kept below the soils surface. You need to check the rows constantly and thoroughly to find signs that the asparagus spears are starting to pop up.

15 to 20 minutes of exposure to direct sunlight and the spears will start to turn green. If you miss some and they turn on you , just let them grow into normal green spears.
When inspecting you’ll be looking for small cracks in the surface soil caused by plants struggling to emerge, Once you are certain you’ve spotted emerging spears carefully insert a knife through the soil and the mulch , to shear off the shoot about 6 to 10 inches below the soils surface.
When you’ve done this carefully pull up the shoot , and I need to accentuate the word “carefully” because it must be done with great care so as to avoid excessive damage to the nearby roots system and plant, as well as other shorter shoots nearby.
You may well mess up a few spears in the process, it takes practice, but don’t worry – a few less asparagus spears is not the end of your Gardening career. Once this is done -you’re done – you’ve harvested your first White Asparagus spears.
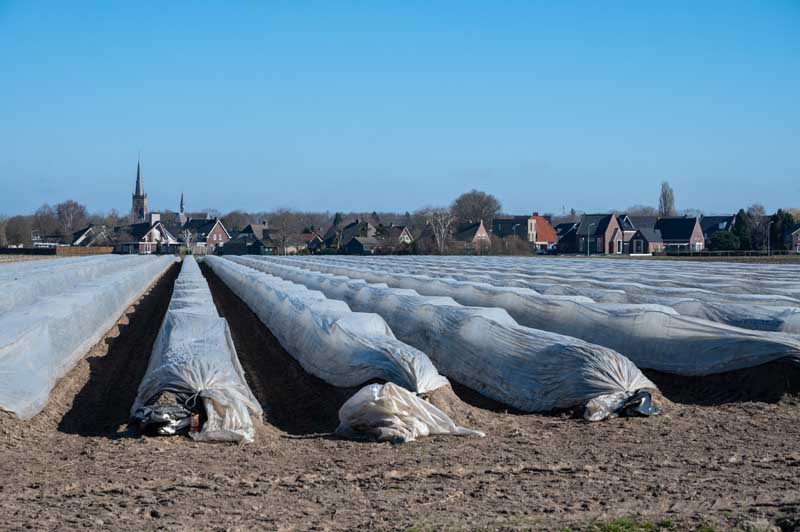
Hoop Method
Another slightly more difficult method involves using hoops covered with black plastic to block emerging spears form the sunlight. This is the method generally used by commercial growers.
To harvest the white asparagus, roll up one side of the black plastic cover and set it atop the reinforcing hoops. Don’t leave the cover up for too long, as previously stated, it doesn’t take long for asparagus spears to suck up the sunlight and begin to green.
Using this method air circulation is sometimes an issue, especially in the dog days of summer.
You can somewhat control the temperature by leaving one end of the cover open to release heated summer air, but be careful to do it in such a manner as to not allow plants access to the sunlight – they should never, or at least very rarely see the light of day.
If the heat is not excessively oppressive during the day , you can do this at night.
Irrigation can also be an issue using this method. A drip system or a soaker hose under the black plastic row cover will suffice.
Studies have shown that summer heat will produce asparagus that is somewhat more fibrous, while it will not make the spears unpalatable -it will detract from the desired effect of a delicate subtle albino asparagus spear.
Harvested White asparagus should be stored in a refrigerator , or cool location below 35F. Drying ,water loss of harvested asparagus increases the fiber content so storing in zip lock bags or saran wrap is also advisable.
Simpler Methods
If you only have a few asparagus plants and want to experiment making white asparagus, basically anything that blocks the sunlight will suffice. An unused planter flipped upside down, a plastic tub, and so forth.
Asparagus plants being propagated under any of the methods described above are more stressed than asparagus grown normally.
The plant will naturally send up more shoots in search of sunlight than it would under normal circumstances. You’ll need to weed, feed and irrigate thoroughly as well as monitor the plants for insects and signs of plant disease.
Garden Sanitation
A. Proper sanitary practices are vital to the health of your garden. Proper sanitation can help to ensure disease-free and productive gardens.
B. Try to keep the garden free of any diseased dead or damaged plant materials. Remove cuttings from pruning and trimming and either destroy them – if diseased, or send them to the compost pile. Leaving rotting fruits and vegetables in the garden is like a written invitation to unwanted pests and diseases.
C. If a diseased or dead plant part has to be cut, the microorganism that caused the problem is probably on the tool you just used. Like a surgeon, sterilize all tools by washing in soap and water – rubbing alcohol wouldn’t hurt either. If you pinch off diseased plant parts, wash hands before handling any other plants.
D. Keep Weeds under control.
E. Make sure that any compost you put in your garden is completely decomposed to prevent disease organisms it may contain, from spreading.