What are Microgreens
Micro greens are small immature vegetable greens, they are differentiated from sprouts in that they are harvested later than the sprout stage but before the plant approaches maturity. They are further differentiated by some culinary aficionado’s from ‘baby greens’ as baby greens can be considered veggies that have just started to reach maturity but are still adolescents. So micro greens would basically be veggies and herbs slightly advanced beyond the sprout stage.
Microgreens are used as a flavor or visual appeal enhancement in many upscale dining establishments , places where you must be certain to hold your pinky in the air whilst slurping your soup.
Multiple herbs and leafy vegetables can be used as micro-greens. They are used in salads, as garnsihes, and melded into soups and sandwiches. Microgreens are nutritiously endowed as well as tasty, a winning combination. They are considered a “specialty produce’ and can be hard to find and costly at times.
They can however be grown easily, quickly and inexpensively.
A sun drenched windowsill or balcony are great locations, or in the correct season a few spare square feet within your vegetable garden. They are however much easier to propagate in containers.
Many immature edible greens work as microgreens. Leafy vegetables, salad greens, herbs and flowers. Basil, Cabbage, Broccoli, Cauliflower, Mustard greens, Turnip greens, Collard greens, Spinach, Radish, and so forth. You can mix and match within the same containers without worrying about compatibility, they’ll be harvested long before that would normally be an issue.
The best way to grow microgreens indoors
In a suitable container, or seed tray that meets all the standard requirements for seed starting … drainage and so forth. Just as if you were starting seeds for any other garden crop. A warm sunny windowsill terrace or what have you preferably with a southern exposure, assuming you are in the Northern hemisphere, for those ‘down under’ reverse that.
Fill the container with a few level inches of moist potting soil. The soil should be as level as possible in order to facilitate your harvest which isn’t far off when growing microgreens.
Broadcast the seeds uniformly on the potting soil surface and gently press them into the soil. I like to use a piece of flat cardboard. Don’t compact them or the soil just press them in a tad.
Sprinkle another fine layer of soil atop the seeds and apply a light mist. You should be watering as need be with a spray mister so as to avoid disturbing the seeds and the bed. Don’t saturate the soil, just keep it moist. A plastic cover is a good idea, but not absolutely essential.
Sprouts should appear within a week. Once they’ve sprouted remove the cover if you had one. A plastic cover at this point will recirculate moisture and lead to soggy greens.
Largely dependent of the amount of sunlight and warmth they are recieving, your greens should be ready to harvest within a week, in some cases and with some varieties it may take longer.
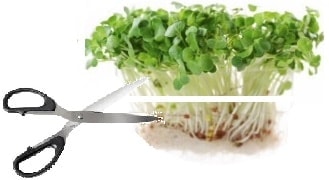
Harvesting Microgreens
The best way to harvest is with a pair of scissors or sharp blade and simply shear them of just above the soil surface. The best time to harvest is once the plants have developed their first set ot true leaves as opposed to embryonic leaves. WHAT !!? You harvested them prematurely – OMG – duck the sky is gonna comne crashing down and the universe is now out of synch. Either that or you have some shoots mixed in with your micro-greens … enjoy.
They are best when served as fresh as possible, but if need be can be stored in the refrigerator for a few days in a plastic bag or container.
Nutritional Information Micro Greens
Microgreens contain substantially higher levels of vitamins and carotenoids than the mature version. A nutritional study was conducted in 2012 at the University of Maryland, indicating that microgreens do indeed have a higher nutritional value compared to mature vegetables. In fact they contain four to six times the vitamins and phyto-nutrients found in mature leaves of the same plants.